
The Filter by Email function in Looker Studio Reports is a powerful way of targeting data to the logged in user. However, this assumes a 1:1 relationship between the email address and the rest of the data in question. What if you had multiple email addresses for whom you wanted to grant viewing rights to the data? The Looker Studio Help Center lays out an effective approach for granting access to multiple email addresses using an Access Control List table. This post explains how to effectively create and maintain the Access Control List in Google sheets using a custom function.
Let’s say your data looks like this:
| Employee Name | Supervisor Name | Supervisor Email | Employee Data |
| Employee A | Supervisor A, Supervisor B | supervisorA@email.com, supervisorB@email.com | Sensitive Data |
| Employee B | Supervisor B, Supervisor C | supervisorB@email.com, supervisorC@email.com | Sensitive Data |
| Employee C | Supervisor D | supervisorD@email.com | Sensitive Data |
By default we would not be able to use the Filter by Email function using the Supervisor Email column, because it is expecting only one email address. Instead, we need to get our data to look like this:
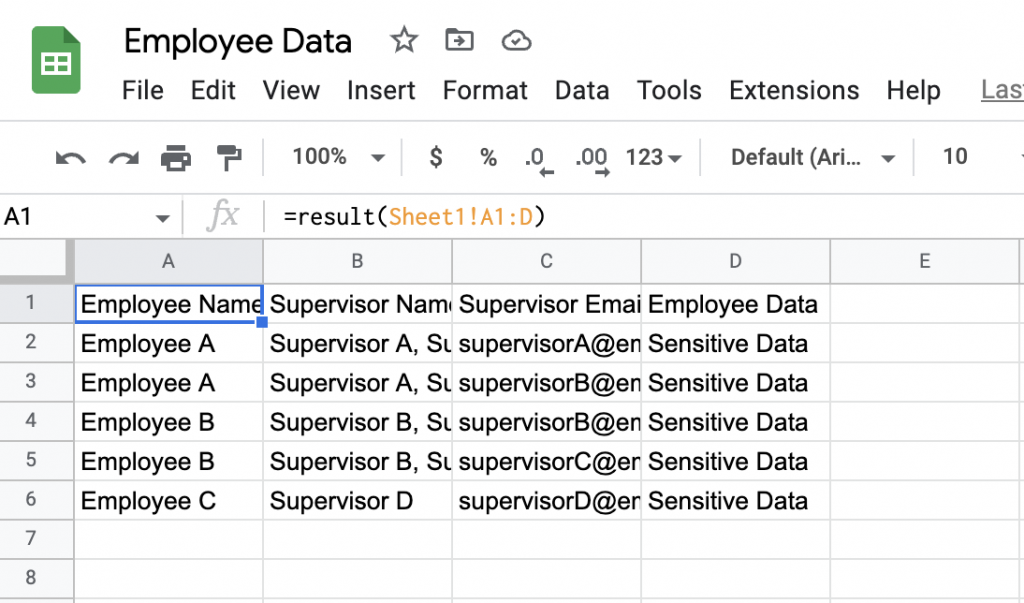
| Employee Name | Supervisor Name | Supervisor Email | Employee Data |
| Employee A | Supervisor A, Supervisor B | supervisorA@email.com | Sensitive Data |
| Employee A | Supervisor A, Supervisor B | supervisorB@email.com | Sensitive Data |
| Employee B | Supervisor B, Supervisor C | supervisorB@email.com | Sensitive Data |
| Employee B | Supervisor B, Supervisor C | supervisorC@email.com | Sensitive Data |
| Employee C | Supervisor D | supervisorD@email.com | Sensitive Data |
This is called our Access Control List table and when you blend this table with your original data set, you can filter by Supervisor Email to achieve the desired outcome. Rather than manually creating this table, we can use a custom function in our Google Sheet to create this output in another tab. By pasting the script below in the Apps Script editor of your Google Sheet, you can easily create your Access Control List table with a simple formula. I can’t take credit for this custom function as it was part of a Stackoverflow solution post. I simply modified the range and added the trim() to remove excess whitespace.
function result(range) {
  var output2 = [];
  for(var i=0, iLen=range.length; i<iLen; i++) {
    var s = range[i][2].split("|");
    for(var j=0, jLen=s.length; j<jLen; j++) {
      var output1 = [];
      for(var k=0, kLen=range[0].length; k<kLen; k++) {
        if(k == 2) {
          output1.push(s[j].trim());
        } else {
          output1.push(range[i][k]);
        }
      }
      output2.push(output1);
    }
  }
  return output2;
}
As written, this custom function looks at the 3rd column in your selected range, in this case it’s the Supervisor Email Addresses, and splits it at the comma, then copies the rest of the row data into the other cells. It does this for each email address in the array. Here is a Sample Google Sheet demonstrating the custom function. Cell A1 on the ACL Tab accesses the custom function.
=result(Sheet1!A1:D)
Hope you found this helpful!